Have you ever watched a http://www.confreaks.com/ presentation that just blew your mind? Something like Code Blindness or How Github uses Github to build Github (language warning)?
I love that feeling of realizing, "why haven't I tried that before?" That sense of learning something new is my favorite thing about the ruby community. In the spirit of that sense of awesome learning I highly suggest Ruby Rogues.
This podcast has several of my favorite rubyists that I follow and it even has some fellow Utahns that I hadn't known about before. In addition to that they have guests on the show like Jim Weirich and Kent Beck. Can you say, "scream like a nerdy fan-girl!"
I started by listening to their most recent podcasts and quickly went back to start at the beginning and get caught up on the backlog of podcast episodes. They have a great mix of common themes with differing opinions that leave me feeling like, "why haven't I ever done that before?"
If you love programming, you will love the podcast. Go Ruby Rogues!

This blog has moved to devblog.riesd.com
Friday, March 30, 2012
Saturday, March 24, 2012
IOIO Controls a Servo
I'm turning into a posting maniac. I'm just getting excited about how close I am to getting a household robot pet. This afternoon I modified the HelloIOIO sample application to include a slider bar that controls an RC servo. I follow a similar approach to http://trandi.wordpress.com/2011/07/03/android-ioio-rc-servo-or-esc/.
Here is a quick video.
Connecting the IOIO
Now that my phone is sending video back to my laptop I am ready to start trying to send commands from my phone to the ioio board. Luckily the IOIO comes with a besic test app to make sure that your board is working correctly before you start your own experiments.
Here is the basic process:
1) Solder some headers to the pinouts you plan to use. I just need pinouts for the power, the 5V reference supply and 2 pins that can supply a 5V PWM signal. Not all of the IOIO pins can provide a 5V signal ( https://github.com/ytai/ioio/wiki/Digital-IO )
 2) Find a DC power source between 5-15V. A 3 cell lipo that I had hanging around worked fine for me. I'm actually using the balance charging plug because those pins just happen to be the right size for my breadboard prototyping wires.
 3) Connect the power source to your IOIO vin and GND headers and you should see the power light come on.
 4) Download the softare package for your IOIO (https://github.com/ytai/ioio/wiki/Downloads)
5) Install the HelloIOIO.apk file onto your device and start the application.
 6) With your IOIO powered, connect the USB cable to your phone.
7) Now you should be able to hit the on/off button and see the status light on your IOIO turn on and off.
 SUCCESS!! Your phone is talking to hardware! Now it is time to start hacking some servo commands together so we can drive an RC car.
Here is the basic process:
1) Solder some headers to the pinouts you plan to use. I just need pinouts for the power, the 5V reference supply and 2 pins that can supply a 5V PWM signal. Not all of the IOIO pins can provide a 5V signal ( https://github.com/ytai/ioio/wiki/Digital-IO )
5) Install the HelloIOIO.apk file onto your device and start the application.
7) Now you should be able to hit the on/off button and see the status light on your IOIO turn on and off.
Thursday, March 22, 2012
Step 1 - connect the phone to the robot
So the first step of my project is to make sure I can use my android phone to control my robot. Since the last post I have decided to scrap the idea of using a Roomba (my Roomba was dropped and damaged). So my platform of choice for the immediate future will be my E-Revo VXL by Traxxas.

Photo courtesy of Traxxas
In order to get the hardware signals out of my phone and to the ESC/servos of my car I will be using a IOIO.
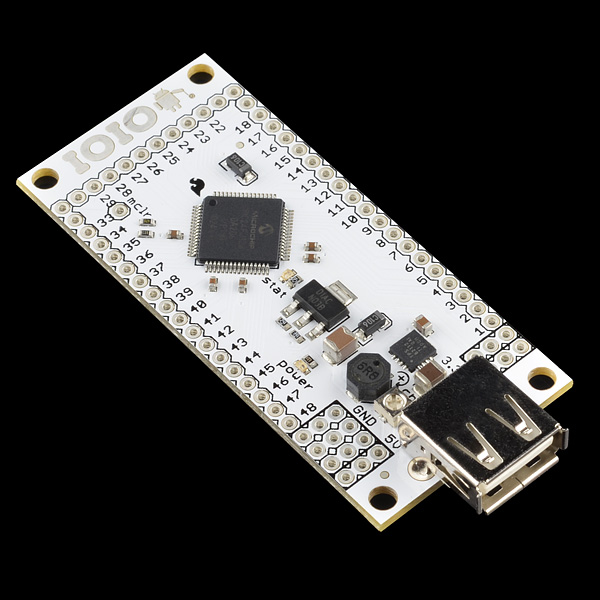
Photo courtesy of Sparkfun Electronics
And in the spirit of not re-inventing the wheel I will be trying to use the source code from the Cellbots team. Don't you love opensource software? They currently don't have any official support for the IOIO, but out of the box their android code does support a browser-based remote control tool and sending images from the camera back to the controlling client.
A cursory glance at their codebase (I wish they were using Github because I love forking and pull requests) looks like they are making some assumptions about using Bluetooth for connecting to the robot, but I should be able to hack together a control class for my IOIO and at least get to the point where I can send some commands from my laptop/browser to the phone and passed onto my IOIO. From that point it is just a matter of generating the PWM signals that my RC servos/ESC are expecting.
Tonight I got as far as getting the cellbots app on my phone and streamed images back to my laptop and sent some controls back and forth. The IOIO just arrived in the mail this afternoon so I haven't had a chance to hook that up yet.
Sunday, March 18, 2012
Welcome
So after spending (wasting) lots of time thinking about various ways I could keep track of my various technical hobbies I decided to just use the simplest good tool for the job. This blog will basically just be a place for me to write down the things that I am working on in the following areas:
- Robotics
- Programming
- RC Aircraft (planes and helis)
I'll backfill some recent content so that blog isn't empty, but mostly I'll be focusing on upcoming projects. The next big project on the list is taking an online computer vision course (http://www.vision-class.org/) which is slated to start this month. I'll be taking the class along with my programming buddy Duane and I'll have a project to go with it.
Roomba! I have played with roombas before and rescued one from the D.I. for $10 which is how I got hooked. For a long time I have thought about using my android phone to act as the brains and sensors for my roomba so I could get it to accomplish more complicated tasks like:
- Hunt for a tennisball
- Welcome guests at the door
- Wander around my office and deliver audio messages (trolling people most likely)
So with the computer vision class coming up I finally ordered a IOIO (http://www.sparkfun.com/products/10748) which I have been thinking about doing for a while so I am just going to buy it and go get my broken roomba out of storage and hook them together. Pictures/videos to come soon.
Subscribe to:
Posts (Atom)